

Bricks have been a popular building material for centuries, offering durability, aesthetic appeal, and strength. However, over time, the mortar holding these bricks together can wear out. This deterioration can lead to a variety of problems. Repointing is the process of renewing the external part of mortar joints to ensure the continued health of the brick structure. Here’s our step-by-step guide on how to effectively repoint brick.
Identifying the Problem
Before starting any repointing work, it’s crucial to identify the issue at hand accurately. Not all wear and tear on brickwork needs repointing. Sometimes, it might be a simple cleaning that’s required. However, some telltale signs can indicate that repointing is needed.
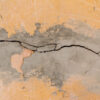
The first sign is visible gaps or holes in the mortar. Over time, weathering and decay cause voids in the joints between bricks, which can be damaging if left unrepaired. These voids allow water to enter, potentially resulting in significant damage to the brickwork and the structure’s interior.
Another indicator is crumbling mortar. If you can easily scratch away the mortar with, say, a key or the edge of a screwdriver, it’s a sign that the mortar is deteriorating and needs attention.
Efflorescence, a white powdery substance on bricks, can also signal an issue. This substance is a salt deposit, which indicates that water is getting into the brickwork and evaporating, leaving the salts behind.
Bricks that are damp to touch, discolored, or show signs of frost damage might also indicate problems with the mortar. It’s crucial to address these issues promptly. When water gets into bricks and freezes, it can lead to spalling, where parts of the brick flake off.
Once the need for repointing is established, it’s also vital to understand the cause of the damage. For instance, if a leaking roof or gutter is causing the brickwork’s deterioration, it’s important to address that root problem first. Otherwise, you might find yourself needing to repoint again soon.
Removing Damaged Mortar
Once the problematic areas of the brickwork have been identified, the next critical step is to remove the damaged mortar. This process is crucial as applying new mortar over old, decaying material is ineffective and will not provide the desired longevity or structural strength. Proper removal ensures the new mortar adheres correctly and revitalizes the brick structure.
Begin by using safety equipment, including protective eyewear and gloves. This ensures that any flying debris doesn’t harm you during the removal process. Additionally, protecting the surrounding area with drop cloths can help catch any falling mortar and make cleanup more manageable.
To remove the old mortar can be used depending on the depth and extent of the damage. Chisels, pointed trowels or even specialized tools like a raker bar can be useful. For larger areas or more in-depth removal, power tools equipped with a mortar removal attachment might be more efficient. But remember, while power tools can speed up the process, they also require careful handling to avoid damaging the bricks.
When using any tool, the key is to remove mortar to a depth roughly twice the width of the joint. This ensures there’s enough space for the new mortar to bond properly. During removal, work carefully, always focusing on the mortar and avoiding putting too much pressure on the bricks. Cracked or damaged bricks can further weaken the structure.
As the damaged mortar is removed, it’s essential to clean out the joints routinely. This can be done using brushes or compressed air. Cleaning ensures that no loose particles remain, which might hinder the bonding of the new mortar.
This process, while time-consuming, is vital. Proper removal of damaged mortar forms the foundation for the repointing process. It ensures that when the new mortar is applied, it has a clean, firm base to adhere to, ultimately ensuring the longevity and health of the brick structure.
Preparing to Repoint Brick
Preparing to repoint brick is like setting the stage for a performance; the better the preparation, the smoother the final act of repointing will be. This stage involves ensuring that everything is ready, from mixing the right mortar consistency to having all tools at hand to ensure the brick structure’s optimal health.
Firstly, it’s vital to choose the correct type of mortar for the job. There are various mortar types available, each with a different strength and composition. Using the wrong mortar can lead to a mismatch in texture and color and in some cases, might even damage the bricks. It’s often advised to take a sample of the existing mortar to a specialist or a lab where they can determine its composition. This way, you can replicate the original mix as closely as possible, ensuring a visual and structural match.
Once the right mortar type has been identified, it’s time to mix it. The mortar should be consistent and accessible to work with but not so wet that it drips. Mixing in small batches can help maintain consistency throughout the repointing process.
Next, gather all the necessary tools. Typically, you’d need a pointing trowel, a hawk (a hand-held platform for holding the mortar), jointing tools for finishing the joints, and a soft brush. Having everything within arm’s reach can save time and reduce interruptions once the repointing starts.
Another essential preparation step is dampening the brick joints. This can be done using a mist sprayer or a damp cloth. The goal is to prevent the bricks from drawing moisture out of the new mortar too quickly. If the mortar dries too fast, it might not bond properly, weakening joints.
Finally, it’s a good practice to start repointing in a small, inconspicuous area. This “test patch” allows you to get a feel for the process, adjust the mortar consistency if needed, and ensure that the color and texture match the existing mortar.
Thorough preparation sets the groundwork for the success of the repointing job. By giving ample attention to details and ensuring everything is in place, you’re laying down a foundation for a brick structure that’s not only visually appealing but also structurally sound for years to come.
Mixing Mortar
The art of mixing mortar is pivotal in the repointing process. The right mix can mean the difference between a long-lasting, sturdy brick structure and one that deteriorates rapidly. It’s crucial to strike a balance in the consistency and composition of the mortar to ensure it complements the brick and offers durability.
To start, one must understand the components that go into mortar. The primary ingredients are lime, sand, and cement. The proportions of these ingredients can vary, but a common mix for repointing historic brick structures is one part lime to two parts sand. For structures that need a stronger mortar, adding cement can provide additional strength. However, it’s crucial to note that the mortar should always be softer than the brick it’s supporting to ensure the brick’s longevity.
When mixing, always add the dry ingredients into a mixing container or a mortar mixer before introducing water. This ensures a uniform mixture. Add water gradually, mixing continuously until the desired consistency is reached. The ideal consistency resembles peanut butter – smooth enough to be applied easily but firm enough to hold its shape.
Temperature and weather conditions play a role in how the mortar sets. On hot days, you might need to add a bit more water to the mix, while on cooler days, less might be needed. It’s also advised to avoid mixing mortar on extremely cold days as it can affect the setting process.
Once mixed, let the mortar sit briefly, often called the “slaking” process. This allows the water to fully activate the lime, resulting in a more consistent mixture. After slaking, give the mortar another quick mix, and it’s ready to use.
Keep in mind that mortar starts to set once it’s mixed. Therefore, it’s best to mix in batches that can be used within a short time frame, typically within an hour or two, to ensure its effectiveness.
Applying New Mortar
Once you have mixed the mortar to the desired consistency, the next step in the repointing process is to apply it. This phase is crucial, as how the mortar is applied will determine the final appearance and strength of the brickwork.
Begin by ensuring that the area where the mortar will be applied is clean and free from any loose debris or old mortar remnants. A clean surface ensures that the new mortar adheres appropriately to the brick and provides a strong bond.
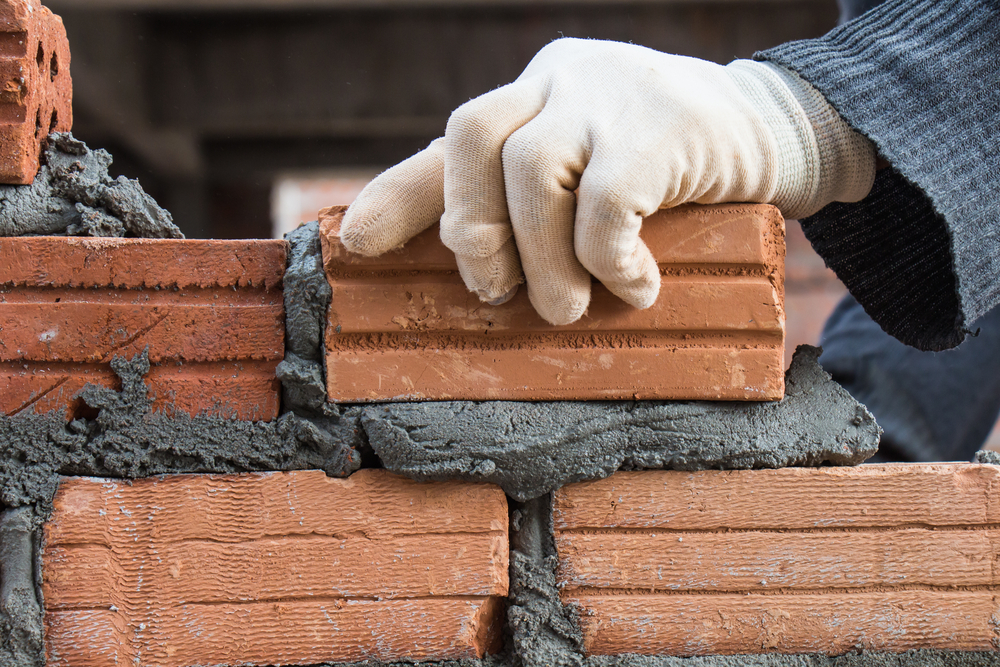
Using a pointing trowel, scoop a good amount of the mortar mix. Spread the mortar onto the trowel’s edge, allowing precise application. When applying the mortar, push it firmly into the brick joints to ensure a snug fit. It’s essential to fill the joints thoroughly so that no voids or air pockets remain. These can weaken the bond and lead to premature deterioration.
As you work, ensure that the mortar is applied evenly across the brick surface. Be meticulous in ensuring that all joints, both vertical and horizontal, are uniformly filled. This not only ensures structural integrity but also gives a neat appearance to the finished work.
Once a section of the brickwork has been filled, use jointing tools or a smaller trowel to shape and smooth the mortar joints. This can be done to match the existing style of the brickwork or to create a new design. The aim is to ensure the mortar is flush with the brick surface and has a consistent appearance.
After shaping, any excess mortar on the brick surface should be cleaned immediately using a damp sponge or cloth. This prevents staining and keeps the brickwork looking neat. However, wait until the mortar has started to set a bit before cleaning to avoid smudging.
Throughout the application process, it’s crucial to work at a steady pace. Since mortar begins to set once it’s mixed, there’s a limited timeframe within which it remains workable. If you find the mortar hardening before you’ve applied it, it’s best to discard that batch and mix a new one.
Unveiling the Art of Brick Restoration
Brickwork, a timeless architectural choice, often requires upkeep to maintain its aesthetic and structural integrity. The brick restoration process is intricate, involving steps like identifying problems, carefully removing old mortar, preparing the bricks, mixing the right consistency of mortar, and expertly applying it. A pivotal part of this restoration process is repointing, which can breathe new life into aging or damaged structures. For those seeking professionals in this craft, Premier Building Restoration stands out as a reliable choice. Their expertise in brick restoration ensures that the beauty and strength of brick structures are revitalized, preserving their historic and architectural significance. Trusting experts like them means ensuring the restoration is done right, blending the old with the new seamlessly.